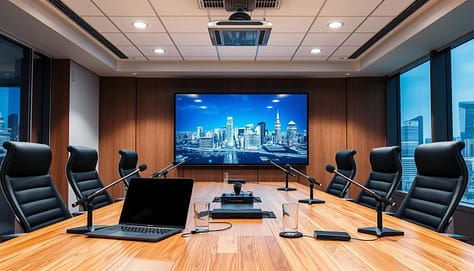
The way we work together has changed a lot. We don’t just sit around a table anymore.
Now, we need the right tools for meetings to go well. Good audio-visual equipment lets ideas flow without tech problems.
Hybrid work is here to stay. It means we need tech that connects everyone, in person or online. Everyone should be heard and seen well.
Good tech does more than fix audio and video issues. It builds trust and makes your team more efficient. Clear communication is key to success.
Bad tech can ruin a meeting. That’s why we made this guide. It’s your guide to a space where tech just works.
We’ll make complex tech easy to understand. From checking your room to recording presentations, we’ve got you covered.
Let’s create a space where your team can focus on ideas. Are you ready to start?
Room Audit: seating, sightlines, light control, sound checks
Before we dive into cables and settings, we need to become detectives of our own space. A proper room audit isn’t about complex tools. It’s about using your eyes, ears, and common sense to understand the environment where your technology has to perform. Getting this foundation right makes every single other decision—from display size to microphone choice—simpler and more effective.
The size of your room is your starting point. A small huddle room for 1-4 people needs compact, all-in-one solutions. A large conference room, on the other hand, demands a more strategic setup for video and audio that reaches everyone. Your audit helps you match the gear to the space.
Let’s break down the four key areas you’ll investigate:
- Seating Arrangement: Where do people actually sit?
- Sightlines: Can everyone see the screen comfortably?
- Light Control: Does glare or darkness ruin the view?
- Sound Checks: How does speech and sound behave in the room?
Start with seating and sightlines. Walk to the chair farthest from the screen. Can you read the smallest text on a test slide without squinting? If not, your display might be too small or too far away. Now, sit in a few different spots. Are there columns, plants, or other people blocking the view? Optimizing sightlines often means simply rearranging furniture or adjusting the screen height—it’s a free fix with a huge payoff.
Next, tackle light control. Turn on your main display and observe. Is there a bright window creating a blinding glare on the screen? Do overhead lights wash out the image? This is a common meeting killer. The fix can be as easy as closing blinds, tilting the screen slightly, or turning off specific light banks. Your goal is balanced, comfortable light where faces are visible and content is crisp.
Now, for the truly fun part: the sound check. Your room’s acoustics are key, and basic sound checks are your first line of defense for good audio. First, clap your hands once, sharply. Listen. Do you hear a quick, flat “pop” or a slight ringing “tail” afterwards? That tail is echo (or reverb), and it makes speech sound muddy. This tells you a lot about the room’s basic audio character.
Second, have a conversation. One person stands near the display, another sits at the far end. Talk at a normal meeting volume. Can you hear each other clearly? Hard surfaces like glass, whiteboards, and bare tables bounce sound around, causing echo and making distant speech hard to understand. Optimizing room acoustics with soft materials—carpets, curtains, or acoustic panels—can dramatically reduce this problem. For larger spaces, achieving clear room-wide audio coverage is a must.
By spending this time on your room audit, you’re not just checking boxes. You’re learning the personality of your space. You’ll know its quirks and strengths, which allows you to choose technology that complements it. This proactive step is the hallmark of a reliable, professional-grade meeting environment.
Display Choices: projector vs TV wall; lumens and size guide
Choosing the right display for your meeting room is like picking the centerpiece for a stage. It sets the tone for everything that follows. Your content comes to life here, so let’s choose wisely. We’ll break down the classic debate and give you a clear guide based on your room’s unique needs.
Think of your display as the window into your team’s ideas. For years, the go-to choice was a projector. It’s like a movie theater experience, casting a large image onto a screen. Modern commercial TVs and video walls, on the other hand, offer a different kind of brilliance. They are like ultra-sharp digital canvases built for bright, everyday spaces.
So, which one is right for you? Let’s compare the two main contenders.
Projectors: The Big Picture Specialists
Projectors excel at creating massive images. They are ideal for large auditoriums or rooms you can reliably darken. The key specification here is projector brightness, measured in lumens. More lumens mean a brighter image that can fight ambient light.
For a typical conference room with some windows, aim for at least 3,000 to 4,000 lumens. A completely dark home theater might need less. Remember, a projector needs a screen and careful placement, but it delivers that classic, immersive feel.
TVs and Video Walls: The Clarity Champions
Today’s commercial displays, like new LG UHD signage with BrightSignOS, offer future-proof visuals with stunning brightness and clarity. A large TV or a video wall (multiple screens tiled together) is perfect for well-lit boardrooms and lobbies.
They turn on instantly, have incredible color accuracy, and don’t require a dark room. For a small huddle room, a 55-inch touchscreen might be perfect. A formal boardroom often needs a 75-inch display or larger to ensure everyone has a clear view.
Your Simple Size and Brightness Guide
Your room’s dimensions and lighting decide the winner. Use this simple framework:
- Small Huddle Room (4-6 people): A 55-inch to 65-inch commercial TV is often ideal. It’s bright enough for lights-on collaboration.
- Mid-Size Conference Room (8-12 people): Choose a 75-inch to 85-inch display or a projector with 4,000+ lumens if you have light control.
- Large Boardroom or Auditorium (15+ people): A projector with 5,000+ lumens or a large-format video wall ensures visibility from the back row.
Don’t forget about connections! While we’ll dive deeper into cables later, know that a high-quality HDMI cable is the superstar for carrying a crisp digital signal from your laptop to either a projector or a TV. It’s the reliable standard you can count on.
The goal is to pick a display that feels just right—impressive without being overwhelming. Whether it’s the expansive glow of a projector or the pixel-perfect detail of a video wall, your team’s work deserves to be seen in the best possible light.
Connections: wired priority, casting alternatives, adapters kit
Dealing with cables and wireless options can be overwhelming. This section guides you to perfect connectivity. We’ll cover how to prioritize wired links, find easy casting alternatives, and create a universal adapter kit for any device.
Your connection is like a bridge between your ideas and your audience. A weak bridge causes delays and frustration. A strong one ensures your message flows smoothly.
The Wired First Philosophy
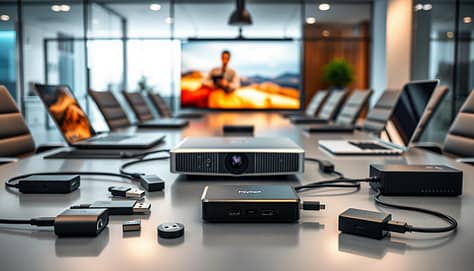
For critical presentations, we recommend a “wired first” approach. A physical HDMI or USB-C cable offers the most reliable, high-quality signal with zero lag. It’s like a dedicated highway for your video and audio.
Wired connections are often preferred for stable, high-quality video calls. They eliminate Wi-Fi congestion or signal interference. Simply plug in and present with confidence.
Your primary setup should always include a high-quality cable directly connected from your main presentation laptop to the display. This is your non-negotiable baseline for reliability.
Embracing Wireless Casting Alternatives
We live in a world where everyone uses different devices. Team members will want to share from tablets, phones, or secondary laptops in seconds. This is where wireless screen casting shines.
Tools like the ClickShare Hub allow participants to share with a single tap, simplifying hybrid meetings. Built-in standards like Miracast (for Windows/Android) and AirPlay (for Apple devices) also offer convenient, cable-free options.
The key is to choose a system that is intuitive for your users. A good wireless system reduces friction and keeps the meeting’s momentum going. It’s perfect for brainstorming sessions or quick reviews.
| Feature | Wired Connection (HDMI/USB-C) | Wireless Casting (ClickShare/AirPlay) |
|---|---|---|
| Reliability | Excellent – No signal drop | Good – Depends on network health |
| Setup Speed | Fast (once plugged in) | Very Fast (often one-tap) |
| Video/Audio Quality | Consistent, high-fidelity | Very good, but can compress |
| Best For | Keynote speeches, final client presentations | Collaborative brainstorming, impromptu shares |
| Device Compatibility | Requires correct port/adapter | Works with many modern devices wirelessly |
Building Your Universal Adapters Kit
“Prepare for everyone” is our mantra. The moment someone can’t connect is the moment your meeting stalls. Avoid this by assembling a small, powerful adapters kit.
This kit is your connectivity safety net. It should live permanently in your meeting room. Here’s what to include:
- USB-C to HDMI: The modern essential for most new laptops.
- USB-A to HDMI: For older laptops and peripherals.
- Mini DisplayPort to HDMI: Covering specific business laptops.
- VGA to HDMI (active adapter): The ultimate legacy lifesaver.
- A multi-port USB-C hub: A powerhouse that adds HDMI, USB-A, and Ethernet.
With this kit, you’re not just supporting technology—you’re supporting people. It empowers every team member to contribute seamlessly, which is one of the key skills every coach needs for leading successful sessions, whether in sports or business.
By mastering both wired and wireless connections and being prepared with adapters, you ensure that your team’s focus stays on the content, not the cable. That’s how you build a truly reliable and inclusive meeting environment.
Audio: mic options, echo control, volume baselines
Ever been on a call where someone sounds like they’re in a tin can? Or you can’t tell who’s speaking? That’s the sound of a meeting breaking down. Perfect audio is the glue that holds a remote collaboration together. Let’s make sure everyone is heard crystal clearly.
Choosing the Right Microphone for Your Space
Your microphone choice depends on your room’s size and layout. For a small huddle room, a simple all-in-one soundbar is often perfect. It combines speakers and mics in one neat package.
In larger spaces, you need smarter technology. Beamforming microphone arrays, like the Yealink CM20, are game-changers. They act like a spotlight for sound, automatically focusing on the person who is talking. This cuts out background noise and makes every word sharp.
For boardrooms where a clean table is a must, ceiling microphones like the Yealink CM50 are ideal. They’re installed overhead, keeping cables and hardware out of sight while picking up voices from all seating positions.
Many modern devices also feature AI-powered noise cancellation. A product like the Yealink DeskVision A24 can distinguish between a human voice and other sounds—keyboard clacks, paper shuffles, air conditioning—and remove the distractions in real-time.
Echo makes conversations exhausting. It happens when sound from the speakers is picked up again by the microphones. The fix is part technology, part placement.
First, follow the one-foot rule: keep microphones at least a foot away from speakers. Second, consider your room’s surfaces. Hard walls, floors, and tables bounce sound around. Adding soft materials like carpets, curtains, or even acoustic panels can absorb those reflections dramatically.
Smart microphone placement is your secret weapon. Point directional mics towards people, not at blank walls or speaker outputs. For more advice on how room dimensions and furniture affect sound, check the official room planning guidance.
Setting a Smart Volume Baseline
You need a standard, comfortable volume level. It should be loud enough for remote participants to hear easily, but not so loud it blasts people in the room or causes distortion.
Here’s a simple way to set it: Have someone sit in the farthest seat from the speakers. Play a standard test tone or a familiar music track at a moderate volume on your conferencing system. Adjust the level until it’s clear and comfortable for that person. That’s your baseline. Mark that setting and try to keep all meetings there.
Remember, great audio is invisible. When it’s done right, no one compliments it—they just have a productive, frustration-free meeting. That’s the goal we’re helping you achieve.
Latency and Sync: clip testing, playback devices, codecs
Latency is that slight delay between audio and video. It can turn a professional presentation into a confusing mess. But, with a few simple checks, you can sync everything up and ensure your hybrid collaboration flows naturally.
Imagine watching a badly dubbed movie. When the words don’t match the mouth movements, your brain works overtime. In a business meeting, this distraction wastes time and reduces clarity. Let’s eliminate that problem together.
Your Simple Clip Test for Perfect Sync
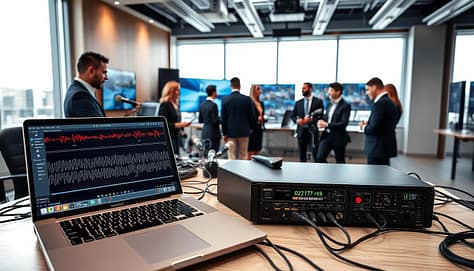
You don’t need expensive gear to check for latency. We recommend a quick “clip test.” Find a short video online with a sharp audio cue—like a hand clap, a drum hit, or a speaker clearly saying “pop.” Play this clip on your meeting room’s primary display through the usual system.
Watch and listen closely. Does the sound happen at the exact moment the visual action occurs? If you see the hands meet before you hear the clap, you have detectable latency. This test gives you a real-world benchmark for your system’s performance.
Playback Devices and Software Settings
Where you play the video from matters. A laptop connected via HDMI might perform differently than wireless casting from a tablet. Test using the same devices your team actually uses for presentations.
Check the audio output settings on your computer and conferencing software. Sometimes, the software selects a different audio device than your room’s sound system, creating a delay. Ensuring everything is routed through one primary system is a key step for sync.
Understanding Codecs: The Behind-the-Scenes Translators
Codecs are the essential software that compress and decompress video and audio signals. They’re like translators for your media. Different codecs (like H.264, VP9, or AV1) handle data at different speeds, which can affect latency.
For video conferencing, systems often use specialized codecs designed for low latency. If you’re experiencing consistent sync issues, check what codec your conferencing platform prefers. A reliable system will prioritize codecs that support seamless, real-time communication.
Modern conference room technology is built to support hybrid collaboration seamlessly. High-quality video conferencing relies on these proper codecs and a well-tuned system. A quick check here prevents the audio drops and visual delays that can derail an entire meeting.
By running this simple clip test and understanding your playback chain, you take control. You ensure your meetings feel natural, professional, and engaging. A little proactive testing saves everyone from a lot of distraction later.
Redundancy: offline copies, spare cables, printed boards
True meeting room mastery is not just about things working. It’s about being ready when they don’t. This is what redundancy is all about. It’s your tech safety net, always ready to keep your meeting smooth.
We’ll show you how to build a simple habit that makes you a tech master. Start with a small “oh-no” kit for your room. It’s not about fancy gear. It’s about simple backups that give you confidence.
- Offline Copies: Keep a USB drive in the room with your important files. If the network goes down, you’re ready in seconds.
- Spare Cables: Carry a pouch with must-have cables like HDMI and USB-C. Having spares means you can solve problems quickly.
- Printed Boards: Have printed copies of agendas and diagrams. It’s old-school, but it helps if screens fail.
This approach matches the key criteria for choosing room tech: reliability. Regular checks and spares prevent small problems from becoming big ones. A well-run room means systems and backups work every time.
Creating this kit is like carrying an umbrella. You might not use it every day, but when you do, you’re really glad. This mindset means you’re always in charge of your meeting’s success. Let’s build that confidence together.
Run of Show: preflight checklist and roles
All your AV gear is set up and tested. Now, it’s time to coordinate the human element. Think of this as your meeting’s “Run of Show”. It’s the backstage work that makes everything run smoothly from start to finish.
This isn’t just about checking boxes. It’s about turning your room into a dynamic space. Here, technology and teamwork come together perfectly.
The Five-Minute Preflight Checklist
Every pilot does a preflight check before flying. Your meeting needs the same attention. We suggest a quick, five-minute check that anyone can do.
Here’s what to check:
- Lights On: Make sure the room is well-lit for screens and comfort. Check for glare on displays.
- System Booted: Confirm all AV equipment is on and showing the right input sources.
- Mics Live: Do a quick sound check. Tap each microphone and listen for clear audio through the speakers.
- Presentation Loaded: Open the main deck on the presentation computer. Check the first few slides to make sure they display right.
- Connections Stable: Verify all wired connections are secure. Also, check that any wireless devices are paired and ready.
Tools like YAROOMS help with room booking and scheduling. But this hands-on checklist catches any last-minute issues.
Assign Clear Roles, Even in Small Teams
Who does what during the meeting? Confusion can cause awkward pauses and technical problems. Even with a small team, assigning clear roles helps everything run smoothly.
Consider these key positions:
| Role | Primary Responsibility | Key Action |
|---|---|---|
| Presenter | Deliver content and guide discussion | Focus on engaging the audience, not operating slides |
| Tech Manager | Handle all AV controls and troubleshooting | Advance slides, adjust volume, manage shared screens |
| Chat Monitor | Bridge communication with remote attendees | Voice questions from the chat and share key points |
You don’t need three people for these roles! One person can often handle both tech and chat duties. The key is that everyone knows their role before the meeting starts.
The Power of the Pre-Meeting Huddle
Gather your key players for a two-minute huddle before starting. This is your final sync-up.
Use this time to confirm the agenda order and highlight any special tech needs (like a video clip). Also, remind everyone of their roles. This brief huddle aligns your team’s mindset and answers any last-second questions.
Automating meeting controls, like setting presentation timers or pre-configuring screen layouts, adds to the seamless experience. But the human huddle ensures everyone is ready to adapt if needed.
When you combine a detailed preflight checklist with clear roles, your meeting becomes more than just a discussion. Your AV setup becomes a well-oiled machine, driving your team toward better collaboration and results.
Post‑Meeting: save annotations, version name, upload rules
The meeting ends, but your tech workflow shouldn’t! A proper post-meeting routine locks in the value of your collaboration. This final step turns a great discussion into actionable, lasting results.
First, save all important data. Did your team use a digital whiteboard like Miro or FigJam? Export those annotations. Capture chat logs from Slack or Microsoft Teams. Tools like Microsoft Teams Rooms offer live transcription you can save for reference. This step protects every idea shared.
Next, give your files a clear version name. A simple system like “ProjectAlpha_Review_2025-10-27” works wonders. This file management practice makes it easy for anyone to find the right document later. No more searching through “final_v2_new_reallyfinal” chaos!
Lastly, follow consistent upload rules. Move the saved files to a shared team folder on Google Drive, SharePoint, or your company’s cloud drive. Set a rule that everyone does this right after the meeting. It ensures information is accessible for future reference.
This post-meeting habit builds your team’s institutional memory. Brilliant ideas discussed won’t get lost. By closing the loop, you ensure your reliable AV setup contributes to lasting productivity long after everyone leaves the room.